Central Office: Transferring Inventory
Inventory Transfers from Central Office are different from location-level transfers in that:
- Central Office can complete an inventory transfer independently, without any action needed from a location.
- Central Office has the ability to use the Autofill Transfer Quantities button, which auto-fills the Transfer QTY field to meet the To Location's inventory needs: products whose on-hand is at or below the order point will be updated to meet their model quantity.
Note: Regardless of a given model quantity in the To Location, Meevo's Autofill will not take more than the From Location's current on-hand. For example if the To Location requires 5 of Product A to reach the model quantity but the From Location only has 3 of Product A, selecting Autofill will only add 3 of that product.
To select the locations
- Type inventorytransfers into the Convobar, or go to Inventory > Inventory Transfers.
- From the Inventory Transfers Search screen, select Add New.
- Select the From and To locations for this transfer.
To load products and transfer inventory
- Load your products using the slideout. You can load products using filters or by adding specific products.
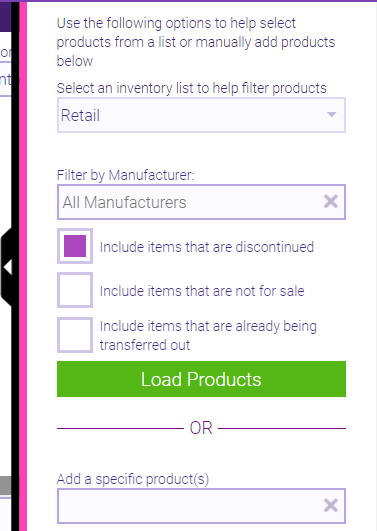
If using filters:
- Select an inventory list to help filter products: Filters products by Retail, Shop Supply, or Retail/Shop Supply.
- Filter by Manufacturer: Displays products for All Manufacturers or a specified manufacturer.
- Include items that are...: Includes or excludes the products described for each option.
- When ready, select Load Products.
If adding specific products, use the Add a specific product(s) typeahead field to add products one by one.
- Once you've added your products, adjust the Transfer Qty column for each product you wish to transfer.

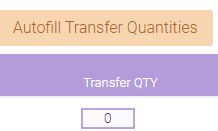
- To quickly update counts, select Autofill Transfer Quantities; products whose on-hand is at or below the order point will be automatically updated to meet their model quantity.
- The updated Inventory Values are not immediately calculated after the transfer is completed. Each locations' precise Inventory Value will be calculated overnight.
- The Estimated Unit Value and Estimated Total Value are calculated automatically by Meevo, so they are not editable. Here's how these fields work:
The Estimated Unit Value is based on the product's wholesale price. After the precise Inventory Value is calculated overnight, the Estimated Unit Value field on a completed transfer will change to Transferred Unit Value. The amount in this field is the accurate Inventory Value as of the end of the previous day. - To transfer a product, the Transfer Qty must be equal to or less than the current On Hand count. If it isn’t, the item label turns red, indicating that you do not have enough on-hand to transfer out this product.

- When finished adjusting transfer quantities, select Save.
- This stages the transfer. No inventory has been transferred yet, so on-hand amounts haven't changed.
- After saving, details about the transfer appear across the top of the page.


- You can continue to edit the Inventory Transfer details, or proceed to Transfer Out.
Note: After saving, the Inventory Transfer will appear in the From location. The From location can transfer out the inventory themselves, or this can be done in Central Office by continuing with the steps below.
- If needed, add a note to the transfer by selecting Notes.
- After selecting Save, the Transfer Out button appears. To transfer the inventory out on behalf of the From location, select Transfer Out, and select Yes on the confirmation message. This step deducts the From location's on-hand amounts.
Note: After transferring out, the Inventory Transfer will appear in the To location. The To location can receive the inventory themselves, or this can be done in Central Office by continuing with the steps below.
- To complete the entire transfer right now, select Receivals in the transfer record. All transfers that are ready to be received appear in this list. Note you can also use the Inventory Transfer Search form to locate transfers that are ready to be received.
- To accept inventory on behalf of the To location, select Receive, and select Yes on the confirmation message. This step adds to the To location's on-hand amount and completes the Inventory Transfer from Central Office.