Advanced OPM: Comments
The Comments feature allows you to view, organize, and respond to comments made on your location and brand page posts. To access it, go to Social > Comments, then use the toggle in the top left corner to switch between different comment views.
Currently, the feature supports Facebook and Instagram comments:
- Facebook: You'll see comments on posts created since your Facebook account was linked to OPM. This includes posts made directly in Facebook or through OPM, and all associated comments will be pulled into the inbox.
- Instagram: You'll see comments only on posts created from OPM after your Instagram account was linked. Posts made natively on Instagram or through another platform are not supported for comment visibility.
This centralized inbox helps streamline social media engagement by giving you an organized view of client interactions across key platforms.
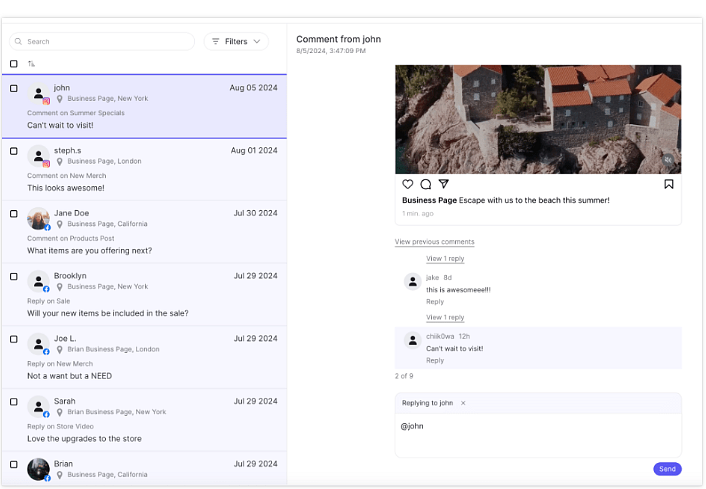
Along the left side of the Comments screen, you’ll see a list of all comments made on your social posts. Each entry displays key details at a glance, including the commenter’s username, the location entity associated with the post, the specific post the comment was made on, the date it was posted, and the comment content itself.
When you click on a comment from the list, a preview of the full comment will appear on the right side of the screen, allowing you to review and respond as needed.
To reply to a comment directly
You can respond directly to a comment by typing your reply into the text box at the bottom of the comment preview and clicking Send.
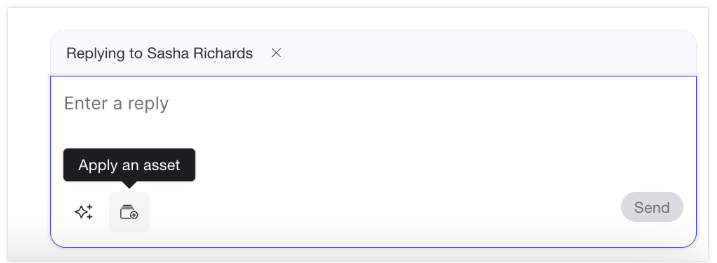
To save time and maintain consistency, the text box also gives you the option to use an AI-generated response or select from a pre-configured text asset, making it easier to engage with clients quickly and professionally.
Replying using text assets
To select a pre-saved Text Asset to include in your response, click Apply a Text Asset stored in the Asset library.
Generating a Comment Reply Using AI
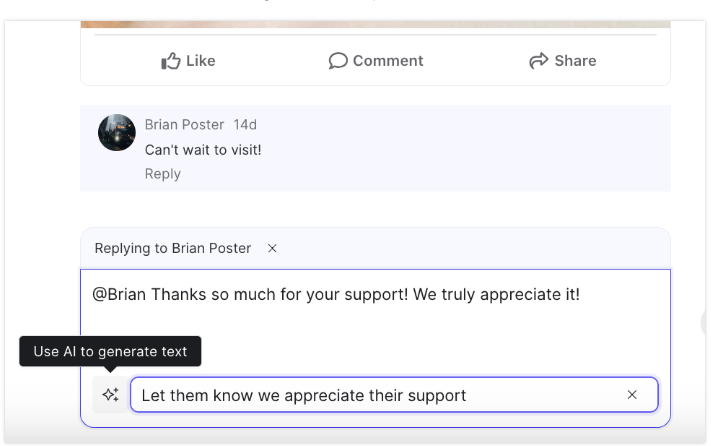
You can generate a reply to a comment by clicking the Use AI to generate text button. When selected, a text input field will appear to the right of the button—this is where you can enter instructions or context to guide how the reply should be written. You can also choose from prompt suggestions or recently used prompts to save time.
After the AI generates a response, you’ll have the option to transform the text with tools that allow you to reword, translate, shorten, or adjust the tone of your comment—helping you tailor your reply before sending.
To hide comments
You can hide comments on a post individually or in bulk. Note that hidden comments will still be visible to the user who posted it, the page admin, and anyone else tagged in the comment.
You can hide most comments on Posts with the following exceptions:
- Comments made by the Page
- Comments made by the Page’s admins
- Comments made by the Page on a User’s Post. The Post is owned by the User.
- Comments made by any User on another User’s Post to the Page. The Post is owned by the User.
- Comments made by an Event creator. The Post is owned by the Event creator.
- Comments made by a Facebook Group. The Post is owned by the Group.
- Comments made by anyone on a review.
Hiding a single comment
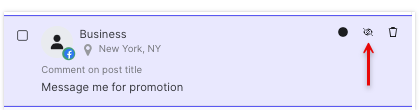
To hide a single comment, find the comment in the list on the left side of the screen and select the Hide Comment icon in the top-right corner.
Hiding comments in bulk
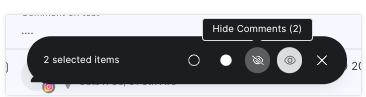
To hide comments in bulk, select the checkboxes next to comments and click the Hide Comments icon at the bottom of the screen.\
Unhiding comments
A “Visibility” filter allows you to filter comments by hidden or not hidden. By default, the list is filtered to only show “Not Hidden” comments.
You can unhide comments using the same two methods (individually and in bulk), but instead you'll click the Unhide Comment icon.
To block users
On the Comments screen, you have the ability to block users and their comments from Facebook posts directly within the platform. However, due to Instagram’s API limitations, blocking users on Instagram is not supported in OPM at this time.
To block a user:
- Navigate to the comment you want to preview from the list of comments on the list on the left.
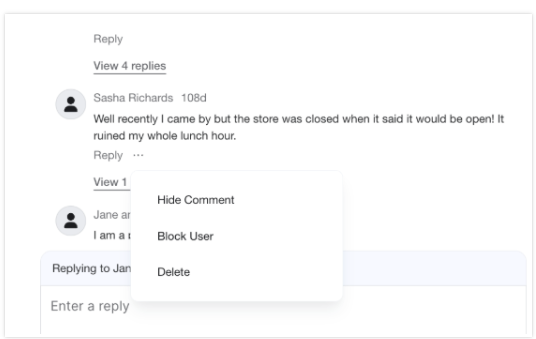
- From the preview on the right, locate the comment and click the ... icon below it.
- Once you select the Block User option, that individual will no longer be able to comment on that location’s posts, and all of their existing comments will be automatically hidden from view on your social posts. If the same user is commenting across multiple location pages, you’ll need to block them separately for each location. The block applies only to the specific location where the original comment was made.
To delete comments
There are two ways to delete a comment from the Comments screen:
- Select the trash can icon of a comment from the list on the left side of the screen.
- Within the post/comment preview, click the ... icon below the comment and select the Delete option.