Creating Analytics Notifications
Analytics Notifications allow you to set up email notifications for updates and important analytics information based on your specified criteria. In addition to Analytics Notifications, you can also create Review Notifications.
Note: Notifications are automatically sent to the email address that was set in Business Information when Online Presence Management was activated at your location. To change where emails are sent, contact MSI Business Support at (973) 402-8801.
To create an Analytics Notification
- Go to Meevo > Marketing > Online Presence Management or type onlinepresencemgmt into the Convobar.
- Select Analytics > Dashboard.
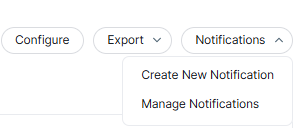
- Select Create New Notification from the Notifications drop-down.
- Select what you would like to include in the notification and select Next.
- Dashboard: Click Select a Dashboard and select your desired dashboard.
- Reports: Click Select report and select your desired report. To include more than one report, click + Add a Report.
- Under Select recipients, choose who is to receive the notifications.
- Owner refers to the user assigned as the owner of the location.
- Specific Email Addresses: This option allows you to specify email addresses as your recipients.
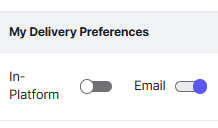
- Next, choose how the information is delivered under Select delivery method(s):
- In-Platform: Notifications are delivered within the Yext platform and accessible via the "bell" icon at the bottom of the left navigation pane.
- Email: Notifications are delivered to the specified email addresses.
- If you chose Email, select Configure Email Settings and follow the steps below.
- Choose how often to send the notifications under Select delivery frequency of the email being sent. Note that if you select Event triggered, you will receive a notification when the review is detected by Online Presence Management, which may be some time after the review is left on the publisher site.
- Next, Review the email subject and/or body and make any changes as needed.
- Finally, choose the format of the content:
- Attach as spreadsheet: All information is delivered as a spreadsheet that is attached to the email.
- Attach as PDF: All information is delivered in PDF format.
- When finished configuring the email, select Save.
- Finally, name the notification, and select Save when finished.
To view, edit, delete, or opt out of Analytics Notifications
On the Notifications page, find the row of the notification you wish to modify:
- To edit or delete the notification details, select the notification and edit/delete as needed.
- To opt-out of a notification, select the toggle for the delivery method.