Adding a Block (Employee Time or a Resource)
When adding a block to the Appointment Book, you'll need to select a Block Type. Make sure you've created a few Block Types to choose from, like Training, Lunch, and Meeting.
- Open the Appointment Book by typing today into the Convobar, or go to Meevo > Appointments > Appointment Book.
- In the desired employee or resource column, select a time.
- Select Block to add a block. The Block Time Editor appears.

- Date: Confirm the date of the one-time block.
- Employees: This field is required if you are blocking off employee time. You can change the employee if needed.
- Start Time and Duration: Select the time frame for this block. The Duration is auto-filled based on the Block Type definition and can be edited here if needed.
- Block Type: Select a Block Type for this block.
- Resources: This field is required if you are adding a block to a resource. You can change the resource from this drop-down if necessary.
Note: Depending on your configuration, it may not be necessary to select a Resource if adding an employee block or an Employee if adding a block to a resource.
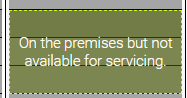
- Reason: Optionally, enter an reason if you wish to provide more information on the purpose of the block. A block's reason appears in the Appointment Book's Smart Assistant, and you can choose whether to display the Reason on the block itself using the option below.
- Display Reason instead of Block Type in the appointment book: Enable this option to display the Reason in the block overlay instead of the Display Name.
- Select Save to save your changes.