Checking In a Client
When the service provider arrives to collect the client for their appointment, change the status of the appointment to Checked In so that you can track the length of the appointment.
Note: Once a client is checked-in, Arrival (initial message), Appointment Booked, and Appointment Edited notifications will not be sent for that appointment.
On the day of the appointment, update the status:
Using Client Quick Find (recommended)Using Client Quick Find (recommended)
- Locate the client using Client Quick Find.
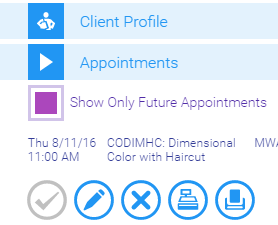
- In the Quick Find Menu, select Appointments to expose the drop-down.
Note: Deselect Show Only Future Appointments to also view past appointments in this list.
- Locate the appointment that the client has arrived for, and beneath it, select Check-In.

- The Check-In icon becomes gray, indicating that the client is checked-in.
Using the Appointment Book EditorUsing the Appointment Book Editor
- Open the Appointment Book.
- Select the appointment. The Smart Assistant displays.
- Select Check In.
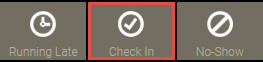
- The button changes to Checked In. The Checked In icon
 appears in the upper-left corner of the appointment.

Note: You can undo this status by simply selecting Checked In a second time.