DE110: Teacher Assistance Report
The DE110 report displays transactions where a student was assisted by a teacher, sorted by Teacher, Student, or Date of transaction.
Report definitions
- Transaction: Depending on your sort option, the data will be grouped by teacher, date, or student. The Transaction column is the transaction number associated with the sale.
- Client: The client who received the service.
- Purchase: The service that was provided or the product that was sold.
- Qty: The number of the item that was sold.
- Total: The total amount credited towards the student or teacher.
- Total Sales for Date Range: The Totals sections are the sum totals for the report, calculated as:
(Total Service Sales Qty + Total Product Sales Qty) and
(Total Service Sales Total + Total Product Sales Total)
Setting up the DE110 report
- Type DE110 in the Convobar, or go to Meevo > Reports > Employees, and then select the DE110 report.
- Select a date or date range for running the report:
- To run a report for a specific date range, select Custom and specify the Start Date and End Date for the report.
- Otherwise, select a predefined date or range (Yesterday, This Week, Last Week, etc.).
Note: If you select a predefined range (a date other than Custom), you can still change the Start Date and End Date. Doing so automatically changes the date range to Custom.
- Sort Report By: This determines how data in the report will be organized (by Teacher, Date, or Student).
- Page Break After Sort Option: When selected, a new page begins for each teacher, date, or student (depending on your sort selection).
-
All Employees: Enable this checkbox to run the report for all employees within the date range. This includes active, inactive (including terminated), and deleted employees. Or, to run the report for specific employees, deselect the checkbox and use the drop-down to select employees or Employee Categories. You can show or hide inactive employees in this list, but deleted employees will never appear here. Note the All Employees "bubble" in the Employee list selects all employees in that list; it is not the equivalent of selecting the All Employees checkbox.
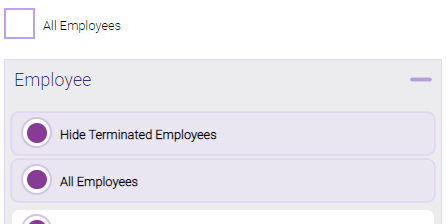
Note: Selecting All Employees will also return any data tied to the House employee.
Running the report
- When you are ready to generate the report, select a Report Format beside the Run Report button.

- Here is a rundown of each format type:
- PDF: Each time you select Run Report with PDF selected, Meevo opens a separate browser tab that displays the PDF'ed report. Meevo remains on the setup page, so you can quickly jump back over to Meevo to run more date ranges or other reports. Each PDF report you run will open its own browser tab, so you can easily review and compare reports by simply jumping between browser tabs.
Note for viewing on iOS: If viewing a PDF on a mobile device running iOS, swipe from left to right on the screen to return to Meevo. - HTML: This is our original legacy format, which opens the report within Meevo. All of the functionality within that report is still there and available via the toolbar.

- XLSX: Each time you select Run Report, your browser auto-downloads the report in .xlsx format. Select the downloaded file in the browser footer to open the spreadsheet.
- PDF: Each time you select Run Report with PDF selected, Meevo opens a separate browser tab that displays the PDF'ed report. Meevo remains on the setup page, so you can quickly jump back over to Meevo to run more date ranges or other reports. Each PDF report you run will open its own browser tab, so you can easily review and compare reports by simply jumping between browser tabs.
- Select Run Report to generate the report in your chosen format. Depending on the type of report and criteria you entered, this process may take a few minutes.